Atlanti Gaz
Related Articles
Gas appliances such as boilers and stoves are essential for many households, providing warmth and cooking capabilities. However, a common issue that can arise with these appliances is a malfunctioning pilot light. The pilot light plays a crucial role in initiating the combustion process, ensuring the appliance operates efficiently and safely. This article aims to provide an overview of pilot light troubleshooting, focusing on gas appliance maintenance and potential solutions for resolving common issues.
Imagine waking up on a chilly winter morning, ready to prepare a warm cup of coffee only to find that your stove’s pilot light refuses to stay lit. Such situations can be frustrating and inconvenient, especially when you rely heavily on gas appliances for everyday tasks. Understanding how to troubleshoot pilot light problems can save both time and money by avoiding unnecessary repair costs or replacements. By identifying the root causes of pilot light malfunctions and implementing appropriate maintenance techniques, homeowners can ensure their gas appliances operate smoothly throughout the year.
In this article, we will explore various aspects related to pilot light troubleshooting for gas appliances including boilers and stoves. We will discuss common issues that may lead to pilot light failures, examine effective maintenance practices to prevent future problems, and offer practical tips for resolving specific concerns. By gaining knowledge about gas appliance maintenance and understanding how to address pilot light issues, homeowners can enjoy the benefits of their gas appliances without interruptions.
One of the most common reasons for a pilot light to go out is a draft. Drafts can occur when there are open windows or doors near the appliance, causing a sudden gust of air that extinguishes the flame. To prevent this, make sure all windows and doors in the vicinity are closed when using gas appliances.
Another potential cause of a pilot light going out is a dirty or clogged pilot assembly. Over time, dust and debris can accumulate on the assembly, obstructing the flow of gas. Regular cleaning of the pilot assembly with a soft brush or compressed air can help maintain its functionality.
A faulty thermocouple can also lead to pilot light issues. The thermocouple is a safety device that detects whether the pilot flame is lit. If it senses that there is no flame present, it shuts off the gas supply to prevent leaks. If you suspect a faulty thermocouple, it may be necessary to replace it with a new one.
In some cases, the gas pressure might be too low to keep the pilot light lit consistently. This could be due to an issue with the gas regulator or supply line. Contacting a qualified technician to inspect and adjust the gas pressure may be necessary in such situations.
If you have tried these troubleshooting methods and your pilot light still won’t stay lit, it’s best to consult a professional technician who specializes in gas appliances. They will have the expertise and tools needed to diagnose and fix any underlying issues.
To ensure optimal performance and minimize future problems with your pilot light, regular maintenance is essential. This includes scheduling annual inspections by licensed professionals who can check for any potential issues and perform necessary cleaning or repairs.
Additionally, following proper usage guidelines provided by manufacturers and avoiding DIY repairs unless you have appropriate knowledge are important aspects of maintaining gas appliances. Remember always to turn off your appliance before attempting any maintenance or repairs to avoid accidents or injuries.
In conclusion, troubleshooting pilot light problems in gas appliances requires a combination of understanding common issues, implementing proper maintenance practices, and seeking professional assistance when needed. By taking proactive measures to maintain your gas appliances, you can enjoy their benefits reliably and safely throughout the year.
Checking for gas supply
Checking for Gas Supply
Imagine coming home after a long day, looking forward to cooking a delicious meal on your gas stove. However, when you turn the knob, nothing happens – no flame, no heat. Frustrating, isn’t it? In this first section of our guide to pilot light troubleshooting, we will focus on checking for gas supply issues in order to identify and resolve potential problems with your gas appliance, boiler, or stove.
Assessing the gas connection:
The first step in diagnosing any issue related to the pilot light is ensuring that there is an adequate supply of gas reaching the appliance. To do so effectively, follow these steps:
- Check the main shut-off valve: Locate the main shut-off valve near the gas meter and ensure that it is fully open. A closed valve can prevent proper flow of gas.
- Inspect visible piping: Visually inspect all exposed pipes leading up to your appliance for any signs of damage or leaks such as corrosion or hissing sounds.
- Test other appliances: Turn on another gas-powered device (e.g., a different stove burner) to determine if it receives sufficient fuel. If not, it may indicate a broader problem with your gas line.
Emotional appeal through bullet points:
To emphasize the importance of addressing potential gas supply issues promptly and avoiding safety hazards, consider the following:
- A faulty gas connection can lead to dangerous situations like carbon monoxide poisoning or explosions.
- Timely detection and resolution reduce risks associated with fire outbreaks caused by inadequate combustion due to low fuel supply.
- Ensuring continuous availability of hot water from boilers prevents inconveniences during daily activities like bathing or dishwashing.
- Proper functioning of stoves guarantees seamless cooking experiences without unnecessary interruptions.
Table: Common Signs Indicating Potential Gas Supply Issues
| Sign | Description | Possible Cause | Recommended Action |
|---|---|---|---|
| Weak flame | Pilot light or burner flames appear weak | Insufficient gas pressure | Check and adjust regulator |
| No flame | Absence of pilot light or burner flames | Gas supply interruption | Verify gas valve position |
| Smell of gas | Detectable odor of natural gas | Gas leak | Evacuate area, call professional |
| Inconsistent heat | Fluctuating temperature output from appliance | Irregular gas flow | Consult a qualified technician |
By thoroughly inspecting the gas supply and addressing any issues found, you have taken an essential step towards resolving potential pilot light problems. Now, let’s move on to the next section where we will focus on inspecting the pilot light itself and identifying possible causes for its malfunction.
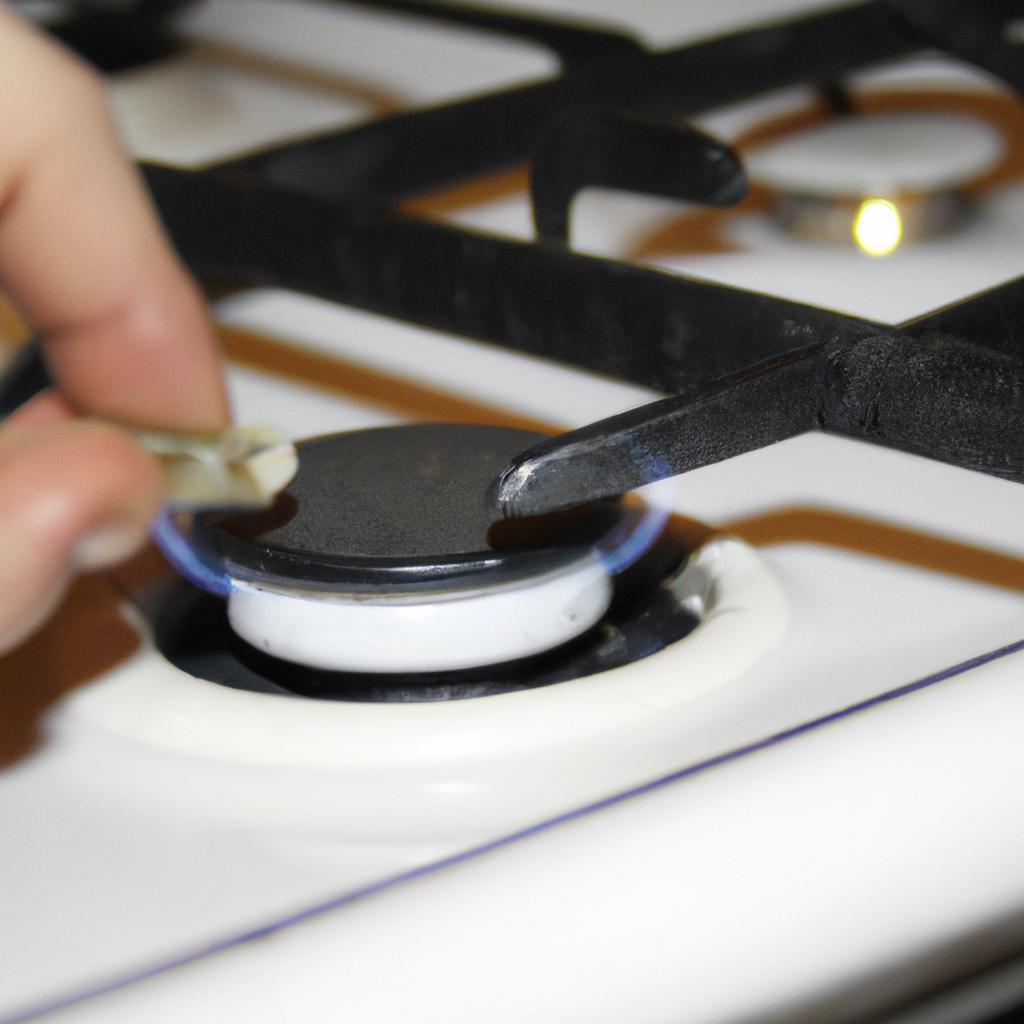
Inspecting the pilot light
Troubleshooting the pilot light is an essential step in maintaining gas appliances, boilers, and stoves. In this section, we will explore the process of inspecting the pilot light to identify any potential issues. To illustrate our points, let’s consider a hypothetical case where a homeowner notices that their stove’s burner flame keeps going out.
To begin with, it is crucial to understand the basic components of the pilot light system. The pilot light serves as an ignition source for the main burner in many gas appliances. It consists of a small flame that remains lit continuously when the appliance is not in use. If the pilot light goes out or burns weakly, it can cause problems such as difficulty lighting the main burner or even complete shutdown of the appliance.
When inspecting the pilot light, there are several key factors to consider:
- Flame Appearance: Check if the flame appears steady and blue in color. A yellow or flickering flame indicates incomplete combustion and may be a sign of dirt or debris blocking proper airflow.
- Pilot Light Positioning: Ensure that the pilot light directly contacts the thermocouple or sensor responsible for detecting its presence. Misalignment can lead to poor signal transmission and result in unexpected shutdowns.
- Gas Pressure: Verify that there is sufficient gas pressure reaching the pilot light assembly by referring to manufacturer specifications. Insufficient pressure can prevent proper ignition or cause unstable flames.
- Ventilation: Assess whether there is adequate ventilation around the pilot light area to allow for optimal air circulation. Restricted airflow due to obstructions like dust or lint buildup can affect flame stability.
To further emphasize these considerations, let us take a look at how different aspects impact typical troubleshooting scenarios involving pilot lights using bullet points:
- A weak and yellowish flame might suggest a dirty orifice pinched with grime.
- An improperly aligned pilot tube could disrupt communication between sensors and result in frequent shutdowns.
- Insufficient gas pressure might lead to intermittent ignition or low flame intensity.
- Restricted airflow due to debris accumulation could cause pilot light snuffing.
In summary, inspecting the pilot light is vital for troubleshooting gas appliances. By examining flame appearance, positioning, gas pressure, and ventilation, homeowners can identify potential issues that may disrupt proper functioning. In the subsequent section, we will delve into cleaning the pilot light orifice as a possible solution to address common problems encountered during inspection.
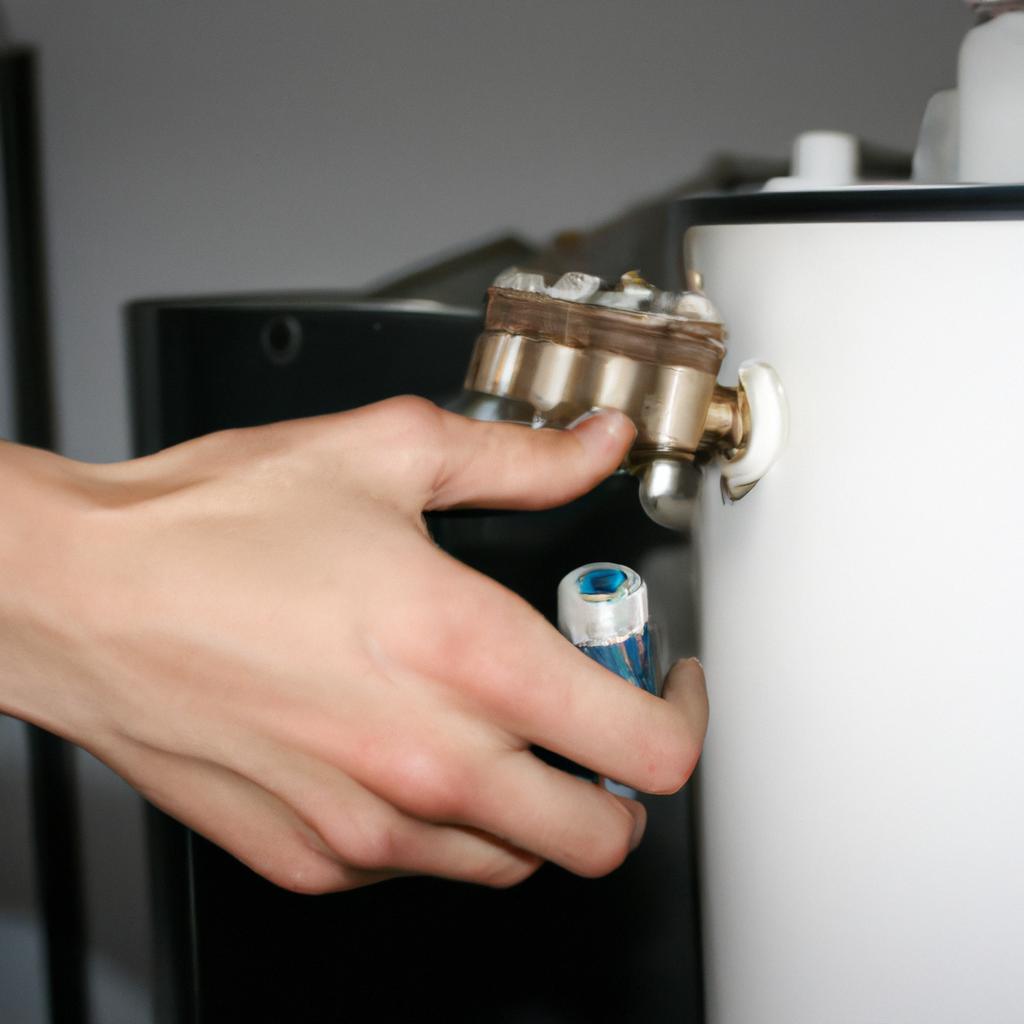
Cleaning the pilot light orifice
Inspecting the pilot light is an essential step in troubleshooting gas appliances, boilers, and stoves. By closely examining the pilot light, you can identify any potential issues that may be affecting its functionality. For instance, imagine a scenario where a homeowner notices that their stove’s burner flame keeps going out unexpectedly. Upon inspection of the pilot light, they discover that it is flickering and producing a weak flame.
To ensure proper maintenance of the pilot light, there are several key areas to inspect:
- Pilot Light Assembly: Check for any signs of damage or wear on the pilot light assembly itself. Look out for loose connections or corroded components that may hinder its performance.
- Gas Supply: Examine the gas supply line leading to the pilot light. Ensure that there are no leaks or obstructions preventing sufficient flow of gas.
- Thermocouple: Inspect the thermocouple connected to the pilot light assembly. A faulty thermocouple can lead to intermittent operation or failure of the pilot light.
- Safety Controls: Verify if safety controls such as pressure regulators and limit switches are functioning properly by conducting appropriate tests according to manufacturer guidelines.
By thoroughly scrutinizing these aspects during your inspection process, you will be able to pinpoint any problems hindering the functionality of your gas appliance, boiler, or stove.
In addition to performing inspections, cleaning the pilot light orifice regularly contributes significantly to maintaining its efficiency and reliability. Over time, dust particles and debris can accumulate within the orifice opening, obstructing proper fuel flow and causing ignition issues.
To clean the pilot light orifice:
- Turn off all power sources and shut off the gas supply before attempting any maintenance procedures.
- Locate the orifice at the end of the small tube near where the burner flames originate from.
- Gently remove any accumulated dirt using compressed air or a small brush designed for this purpose.
- Avoid applying excessive force while cleaning to prevent damage to the orifice.
Regularly cleaning the pilot light orifice helps ensure a consistent and strong flame, enhancing the overall performance of your gas appliance, boiler, or stove. With an efficiently operating pilot light, you can enjoy uninterrupted functionality and peace of mind.
Transitioning into the subsequent section about adjusting the pilot light flame, it is important to understand how to fine-tune this crucial component for optimal performance. By making appropriate adjustments to the flame, you can achieve efficient combustion and avoid potential issues such as carbon monoxide buildup or incomplete burning.
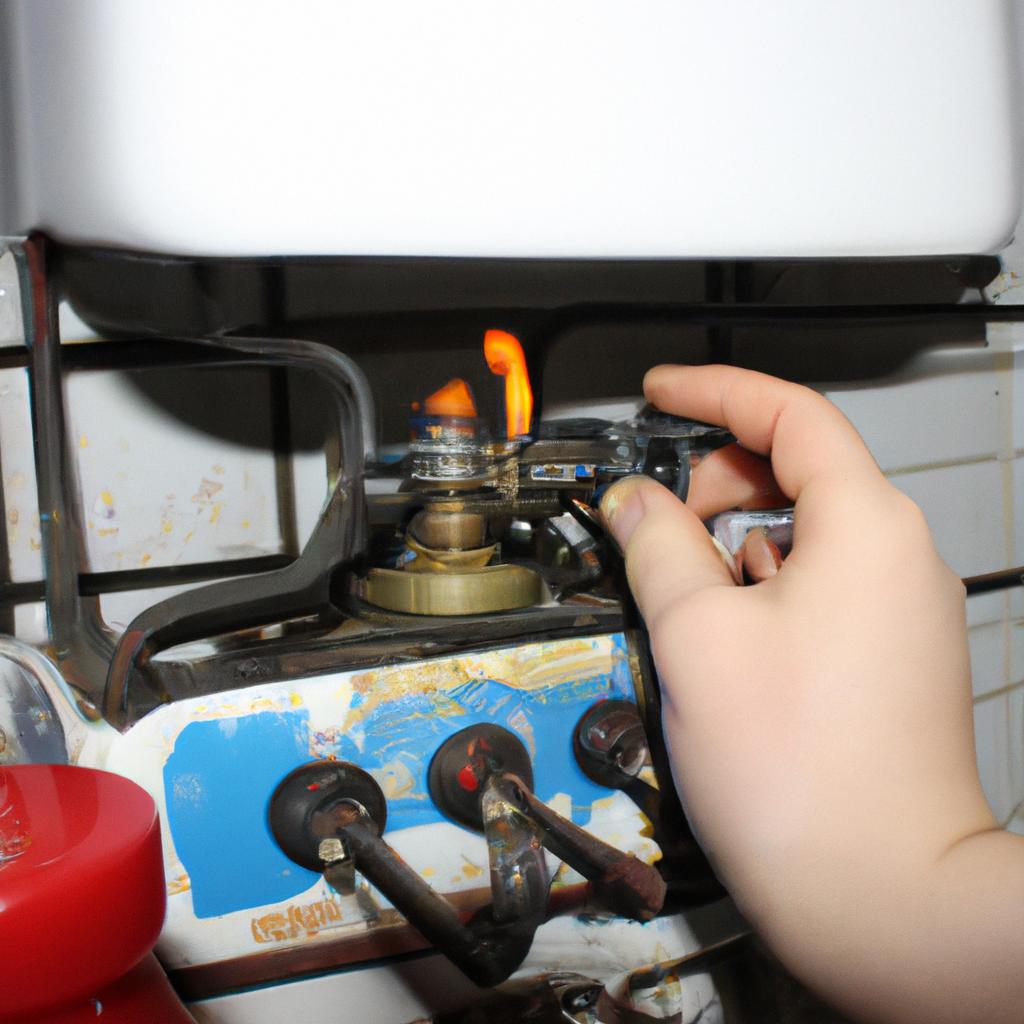
Adjusting the pilot light flame
Troubleshooting pilot light issues is an essential part of gas appliance, boiler, and stove maintenance. In the previous section, we discussed how to clean the pilot light orifice, which can often be a common cause of problems. Now, let’s explore another crucial aspect: adjusting the pilot light flame.
To illustrate this point, consider a hypothetical scenario where a homeowner notices that their gas stove’s flame appears weak and sporadic. They suspect that the pilot light may need adjustment due to natural wear and tear over time. By understanding how to adjust the pilot light flame correctly, they can ensure optimal performance and efficiency.
When it comes to adjusting the pilot light flame, there are several key steps you should follow:
- Locate the adjustment screw: The first step is to find the adjustment screw for your specific appliance. This screw is typically located near the pilot light assembly.
- Turn off the gas supply: Before making any adjustments, always turn off the gas supply to prevent accidents or leaks.
- Use a small flathead screwdriver: To increase or decrease the size of the flame, gently rotate the adjustment screw using a small flathead screwdriver.
- Observe and test: After making changes to the flame size, observe its appearance carefully. Ideally, you want a steady blue-colored flame with no excessive flickering or yellowing.
Adjusting the pilot light flame is crucial as it directly affects both safety and energy consumption. A poorly adjusted flame can lead to inefficient burning of fuel and potentially hazardous situations like carbon monoxide buildup. By ensuring a proper balance in your appliance’s flames through regular adjustments, you can maintain optimal functionality while minimizing risks.
In our next section on replacing thermocouples, we will discuss another vital component related to maintaining efficient operation in gas appliances without requiring professional intervention—thus saving time and money while ensuring household safety.
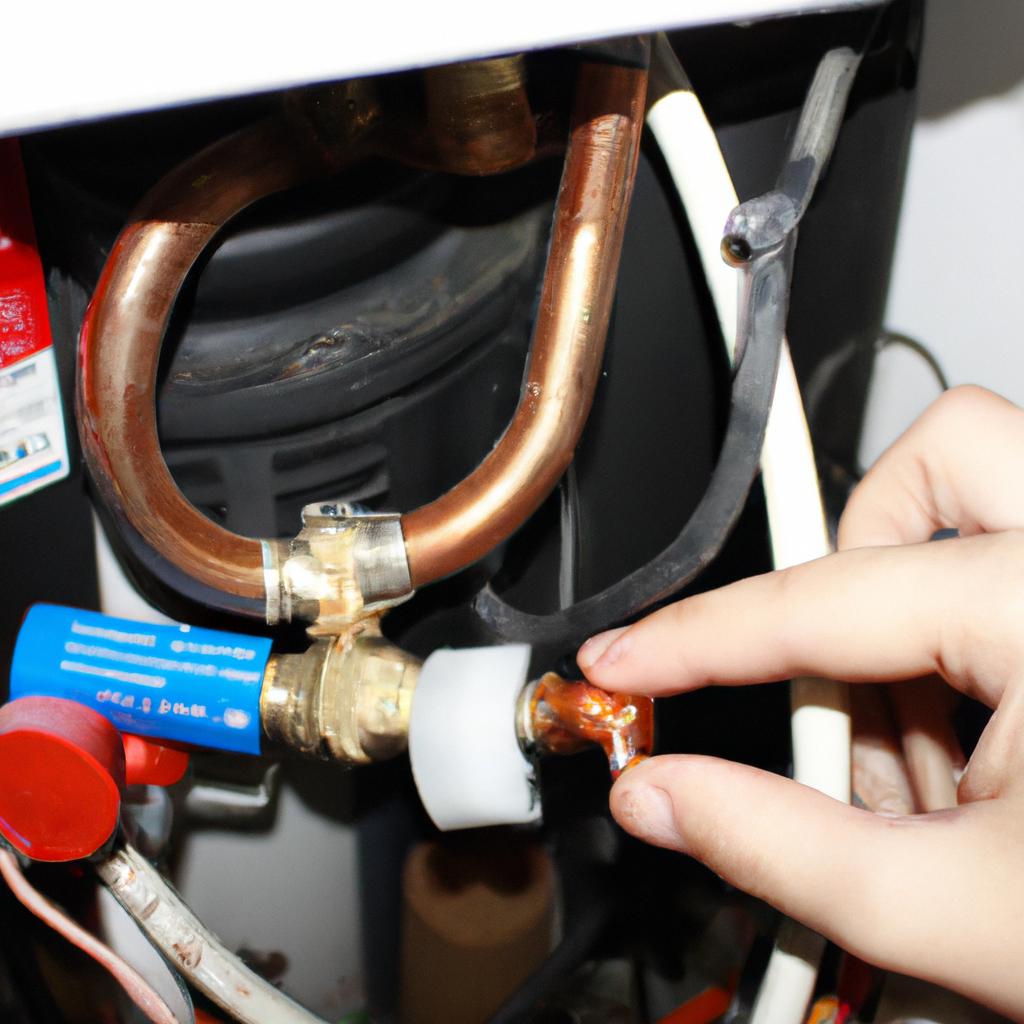
Replacing the thermocouple
Troubleshooting common issues with pilot lights is an essential part of gas appliance, boiler, and stove maintenance. In the previous section, we discussed how to adjust the flame of a pilot light. Now let’s explore another crucial component that can affect the performance of a pilot light: the thermocouple.
To better understand the significance of the thermocouple in maintaining a reliable pilot light, consider this hypothetical scenario. Imagine you have a gas stove where the pilot light frequently goes out, causing frustration and inconvenience during meal preparation. Upon inspection, it is discovered that a faulty thermocouple is preventing the pilot light from staying lit consistently.
When troubleshooting pilot light issues related to the thermocouple, there are several steps you can take:
- Inspect for damage: Carefully examine the surface of the thermocouple for any signs of wear or corrosion. Damaged thermocouples will often need to be replaced.
- Clean regularly: Over time, soot and debris can accumulate on the thermocouple, hindering its ability to generate sufficient voltage. Regularly cleaning it using a soft brush or compressed air can help maintain optimal functionality.
- Check alignment: Ensure that the tip of the thermocouple is correctly positioned within the flame. Misalignment may result in inadequate heat transfer and cause malfunctions.
- Test resistance: Using a multimeter set to measure resistance, test whether your thermocouple produces enough electrical current when heated by holding one probe against each end while heating it with an external source such as a lighter. A reading below 25 millivolts indicates a faulty thermocouple.
Now let’s turn our attention towards replacing the defective thermocouple. By following manufacturer guidelines and safety precautions specific to your particular gas appliance, boiler, or stove model, you can successfully replace a malfunctioning thermocouple without professional assistance.
Transitioning into our next topic about testing the gas valve after resolving thermocouple-related issues, it is crucial to ensure that all components of your gas appliance are functioning optimally for continued safe operation.
Testing the gas valve
Pilot Light Troubleshooting: Gas Appliance, Boiler, and Stove Maintenance
Replacing the thermocouple is an essential step in pilot light troubleshooting. However, there are other factors that may contribute to a malfunctioning pilot light. One common issue is a faulty gas valve, which can prevent the flow of gas to the pilot light. Testing the gas valve should be done after replacing the thermocouple to ensure proper functioning.
Let’s consider a hypothetical example to illustrate how testing the gas valve plays a crucial role in resolving pilot light issues. Imagine you own a gas stove, and recently your pilot light keeps going out unexpectedly. You have already replaced the thermocouple but continue to experience this problem. In such a scenario, it becomes necessary to investigate whether the gas valve is causing this recurring issue.
To test the gas valve on your gas appliance or boiler, follow these steps:
- Turn off all appliances connected to the same supply line as the one being tested.
- Locate the main shut-off valve for your home’s natural gas supply and turn it off.
- Disconnect the pipe leading from the main supply line to isolate only the section containing the suspected problematic appliance or boiler.
- Use a wrench or pliers (as required) to disconnect both ends of this isolated section.
By following these steps, you will effectively separate and isolate any potential problems associated with specific appliances or boilers controlled by that particular gas valve. This process helps identify if it’s indeed the gas valve causing issues with your pilot light.
Now let’s delve into another aspect of maintaining your gas appliances—proper cleaning techniques—to ensure their optimal performance. Regularly cleaning your appliances not only enhances their efficiency but also contributes to safety measures within your household environment.
Emotional Bullets:
- Ensure peace of mind knowing that your appliances are functioning safely.
- Increase energy savings by improving overall efficiency.
- Avoid unexpected breakdowns and costly repairs.
- Create a comfortable and reliable environment for you and your family.
Emotional Table:
| Benefits of Regular Cleaning |
|---|
| Enhanced safety |
| Improved efficiency |
| Cost-effective maintenance |
| Increased peace of mind |
In conclusion, after replacing the thermocouple, testing the gas valve is an important step in resolving pilot light issues. By following specific procedures to isolate problematic appliances or boilers, you can identify if the gas valve is causing recurring problems with the pilot light. Additionally, incorporating regular cleaning techniques into your maintenance routine ensures optimal appliance performance while providing various benefits such as enhanced safety, improved efficiency, cost-effectiveness, and increased peace of mind for you and your loved ones.